First comes ownership, then comes design.
I know what you’re all thinking.
What ever happened to that spec house you guys were doing?
Well, package a really strange pandemic that keeps going on and on and on with a very busy practice and next thing you know, the spec house got moved to the back burner. By the end of 2020, when much of the world was still trying to hang on, our office was fortunate enough to have our team work remotely, and get nine projects submitted for plan check that included 52 residential units.
Just before the pandemic really took hold, we had spent a lot of time working on our spec house design (we are designers, after all) and analyzing the code requirements for this particular site. On any project, factors like client needs, budget, design, etc. may result in sometimes dramatic changes to the original design. In our case, however, changes to the project were driven almost exclusively by the code restrictions on this particular lot.
“Archispeak 101” Revisited – Decoding the Code
We had the lot. The next step was figuring out exactly what we could build on it! 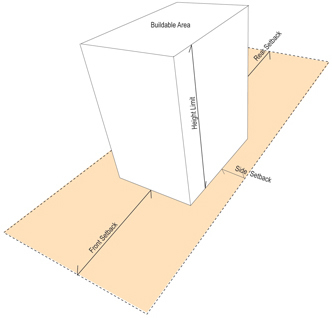 In Los Angeles, the zoning code is king, and it can often be a mercurial and obscure master. All lots have basic codes requirements that regulate the following:
- Density (how many units can be built)
- Yards (minimum front, side and rear setbacks from the property line)
- Height
The key is in the zone name: R1-1 is likely the simplest zone in the book. The first part of the string refers to the zone description, and second to the height district. R1-1 essentially means one residence per lot in height district 1. Sounds simple, doesn’t it?
That’s just the tip of the iceberg. Assuming this is a typical flat lot, the Los Angeles Municipal Zoning Code further dictates yards and height. The front yard could be 20’, or 20% of the lot depth, or the average of the yards on the block, or something else entirely depending on where the lot is located. The side yard starts at 5’ (increasing for over two stories, but decreasing if the lot width is less than 50’), and finally a minimum rear yard must be 15’.
Height then depends on the roof style (greater or less than 25% slope), whether it’s a hillside or coastal area, or a height variation district. And don’t forget that 45 degree encroachment plane starting at 20 feet high starting at both the front and rear setback lines!
See, guys? Easy peasy – just follow Los Angeles’ version of chutes and ladders below and you’ll be on your way. But you get the idea…there are many variables within a specific code book, and it can be tricky to determine which exact perscription applies to a lot.
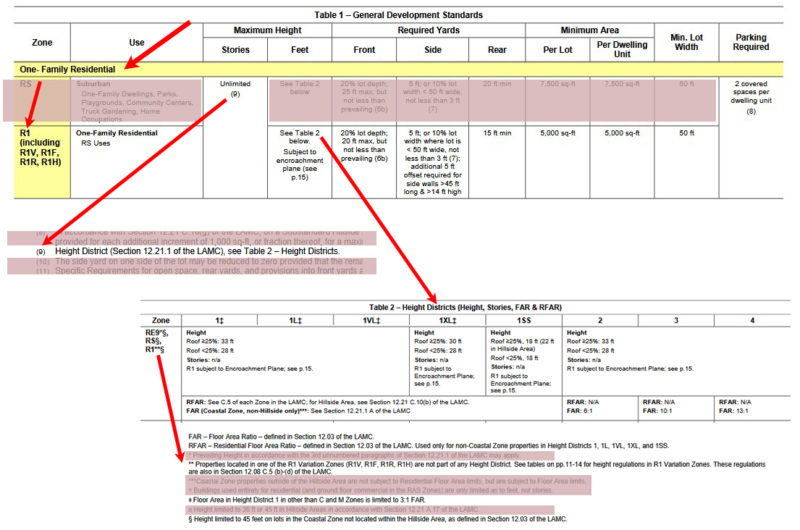
Side note: many locals ask us why building in LA is so expensive, or “Why don’t you have set rates for your architectural services?” We can confidently say it’s because of things like this. There is no chart or easy answer to so many design and construction variables, starting from the most basic question of “How big can my house be?” It takes the thorough review of code, topography, zone overlays, and even the building code to fully comprehend what is possible on each lot – and yes, each lot is unique.
Code-ifying our Lot: [Q]R1-1D
This brings us to the lot we purchased, which has the following zone name: [Q]R1-1D. The key to designing on this lot lies in the two additional letters we see in this name: the [Q] and the D. These refer to additional code requirements: “Qualified Conditions” and “Development Limitations” that apply to lots in this specific part of Los Angeles.
Suffice to say, there is a whole raft of restrictions (and options) incorporated into these two code requirements, including many that impact design. In short, here are the things listed in the various conditions/limitations for the lot:
- Limited height
- Limitations on cantilevered decks/balconies
- Limitations on grading (i.e., amount of earth moved and exported)
- Limitations on length and height of any site retaining walls
- More stringent FAR, or Floor Area Ratio (i.e., limiting size of new building on steep slopes)
- Volume/Massing variation (i.e., second-story setbacks, a division into three building masses, smaller upper floors)
- Compatibility of building materials with architectural style. (Darn! There goes our dream of modern spaceship design!).
Finally, and quite importantly for this corner lot, a completely separate limitation applies for substandard streets (i.e., streets less than 28’ wide) to limit the height of buildings within 20’ of the front property line to 24’ tall.
We’re architects. We can handle this.
Keep in mind, we knew all of these requirements prior to purchasing the lot. If anyone could find a way to design with all these regulations, we could do it. After reviewing it against the 5 Red Flags When Looking for a Vacant Lot, we had some questions:
- Which is the front lot line? The long side of our lot sits on a paved street, but the short side is a “paper” street, which is currently undeveloped. Typically, the “front” is the short side of a lot, however, we planned to access the lot entirely from the long side — so would this make the long side the “front”?
- Would we be required to pave/improve the paper street as part of the development process?
Luckily, the city has various processes to help you verify questions like this. For the first, you can submit a “yard determination” to City Planning to find out what they consider our front yard. We temporarily decided to hold on this, and design for worst case scenario. The second, we submitted a hillside referral form to Bureau of Engineering (BOE) to determine whether any dedications or street improvements would be required.
BOE was able to put our minds at ease with respect to the second question. No, we would not need to pave or improve the paper street. While we pondered the need for our “yard determination” request to City Planning, we set to work on a design that would comply with the worst-case scenario – where the long side of the lot would be the front, and fully half of the house that faced the substandard street would have to comply with the 24’ height limit.
FINALLY! Time to Design!
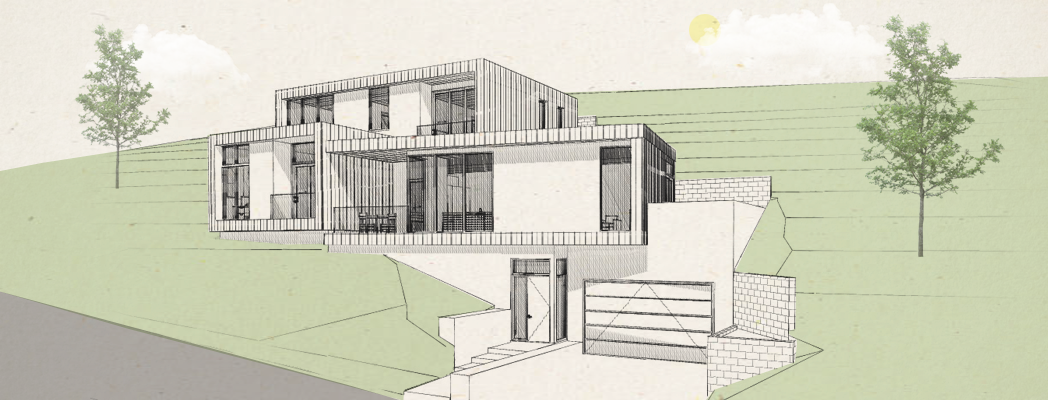
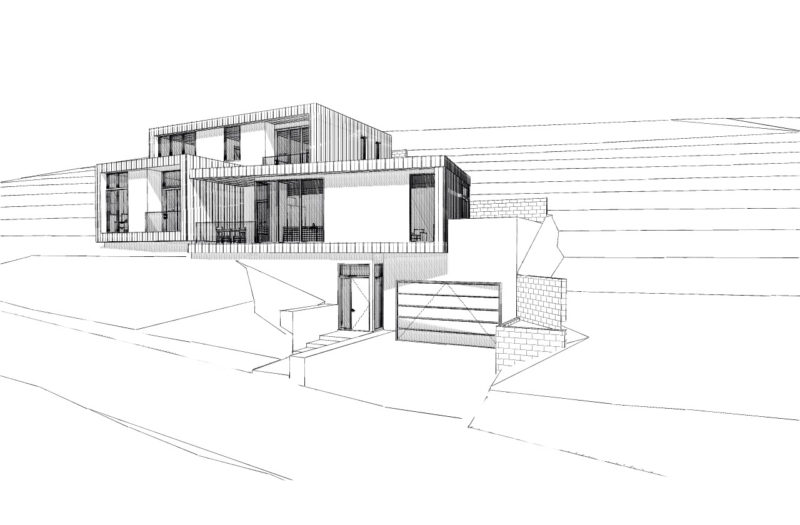
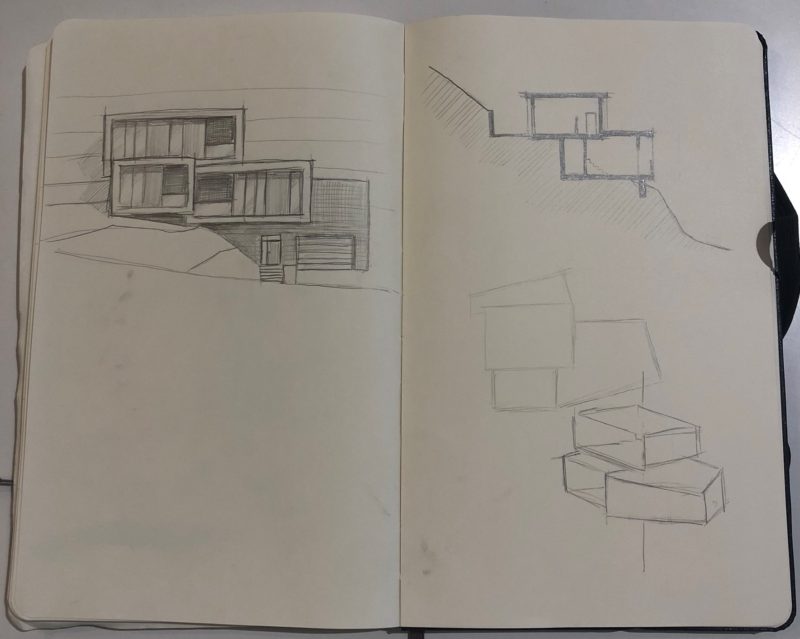 After reviewing all these restrictions, we realized that we had an old design idea we’d sketched out for another project that checked almost all our “code restriction” boxes: three building masses, a second story setback, no cantilevered decks, and it maximized the views from most of the rooms. We started “building” the design in Archicad, our Building Information Modeling (BIM) program, and it all came together very quickly.
We were able to lower the building into grade to keep the height at the front under 24’, but had to balance that alongside the grading requirements to make sure we weren’t exporting more earth than code allowed. It was a delicate balance of nestling the house into the hillside, and eventually resolved to “shore” the back wall instead of using more traditional grading methods to bury the back side of the house into the hill. This saved the grading calcs and allowed us to comply. SCORE!
One of the benefits of working in a program like BIM is that, as we designed, we could calculate on the fly the grading amounts of any cut or fill.
Next up… Budget Check
Remember back when we originally purchased the lot? We had a strict budget for the project, one that assumed an escalation to 2020 prices of no more than $590/sf with a projected sales price of $690/sf in the area. However, as the real estate mind of our group noted, the per sf prices are much higher on smaller houses than on larger ones. In order to make this work, we needed to stay below 2,000 sf. A little fine-tuning, and we were pretty darn close to our target house!
- Code requirements – CHECK
- House size – CHECK
- Budget….???
We sent the preliminary drawings out to our structural engineer and with a preliminary structural design in hand, we hired an estimator to prepare a preliminary cost estimate.
Stay tuned for our next article to see how that turned out. Spoiler alert: it wasn’t good.
New to this journey? Check out some of our past posts in the Architecture In Practice Series:

